TeamCal is a great tool to simplify scheduling using your company’s Google Calendar. This step by step guide will teach you how to use TeamCal to schedule employees (staff, shift, or vacation scheduling) or schedule resources (tools, vehicles, or rooms scheduling).
Before we start, make sure that each employee and resource you plan to schedule has it’s own Google Calendar. This has many benefits, for example giving employees the possibility to access their calendar on a mobile phone. Another great thing about it is that you can see if employees have individual events (like meetings or vacations) planned and use this information during the scheduling process.
💡 Tip: With Google Calendar, you can create new calendars manually. This functionality is super useful to create calendars for resources like vehicles or rooms that do not have a Google Apps login. To do that, click “Add new calendar” inside your Google Calendar. See how.
To start, open TeamCal by clicking “Log in” on the top right of this website or sign-up if you do not have an account now.
1. Add calendars to TeamCal
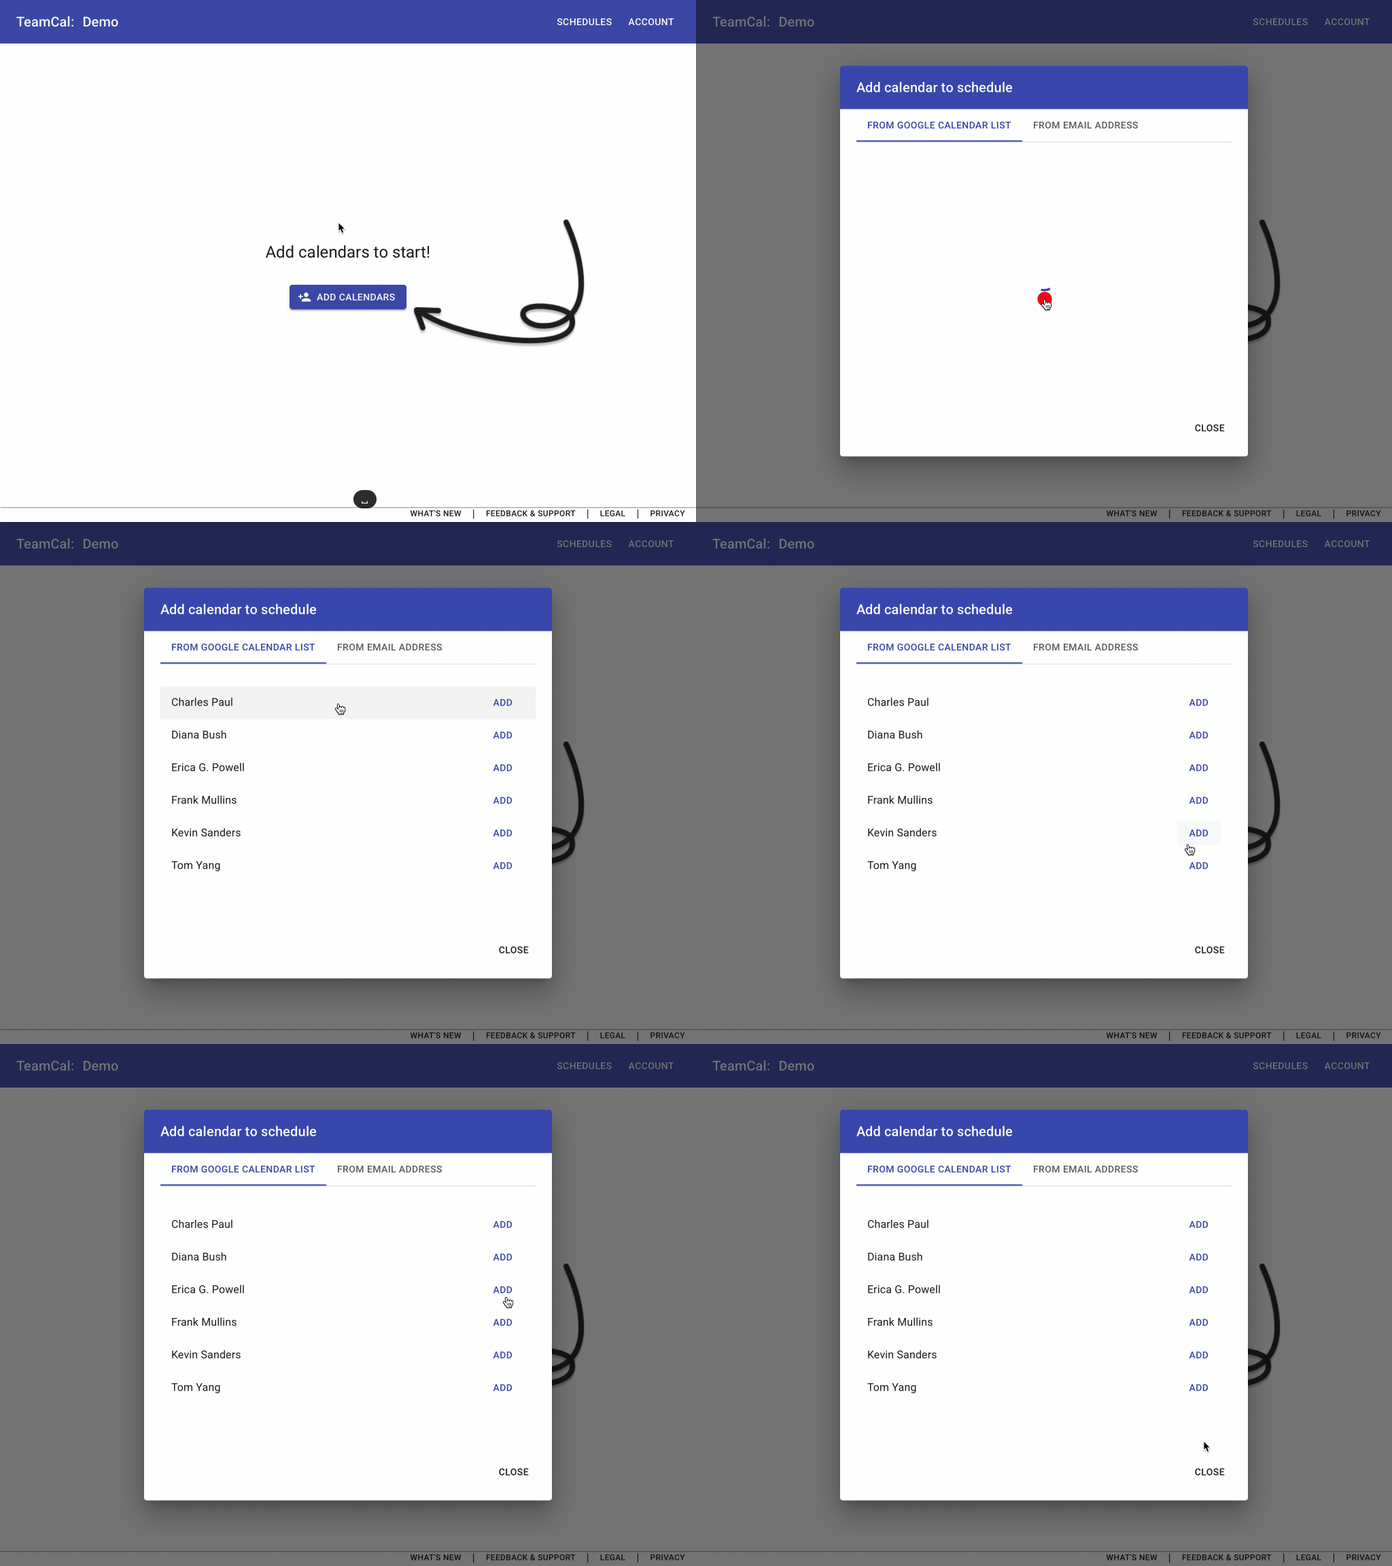
Before TeamCal can display a beautiful schedule, you need to add your desired calendars. Click add “Add a calendar” and chose the name of the calendar you like to add. As an alternative, you can add calendars of other people by using their email address.
⚠️ Note: Before you add a calendar to TeamCal, make sure you have permissions to access that person’s Google Calendar. It depends on your companies GoogleApps settings if other people’s calendars are accessible by default. In most cases, the calendar owner needs to grant permission first. The official Google Calendar documentation explains how to grant those permissions for each calendar. It’s even possible to grant everyone in the company access by default if you are the Google Apps admin.
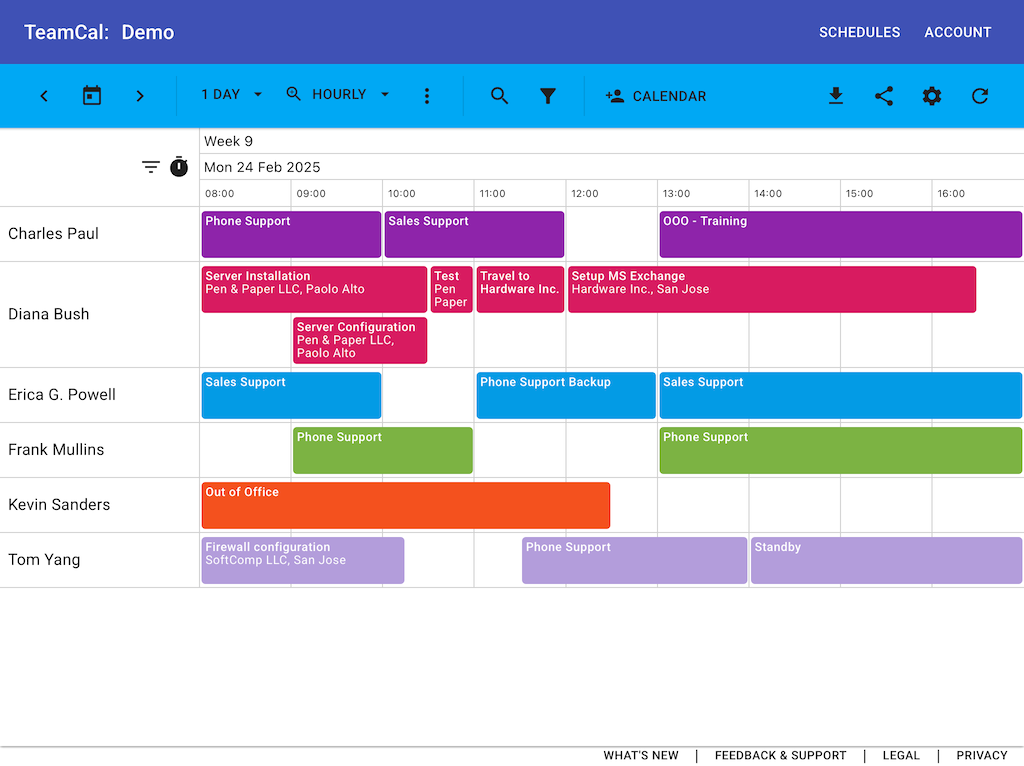
After you added all calendars you end up with a nice scheduling view of your resources:
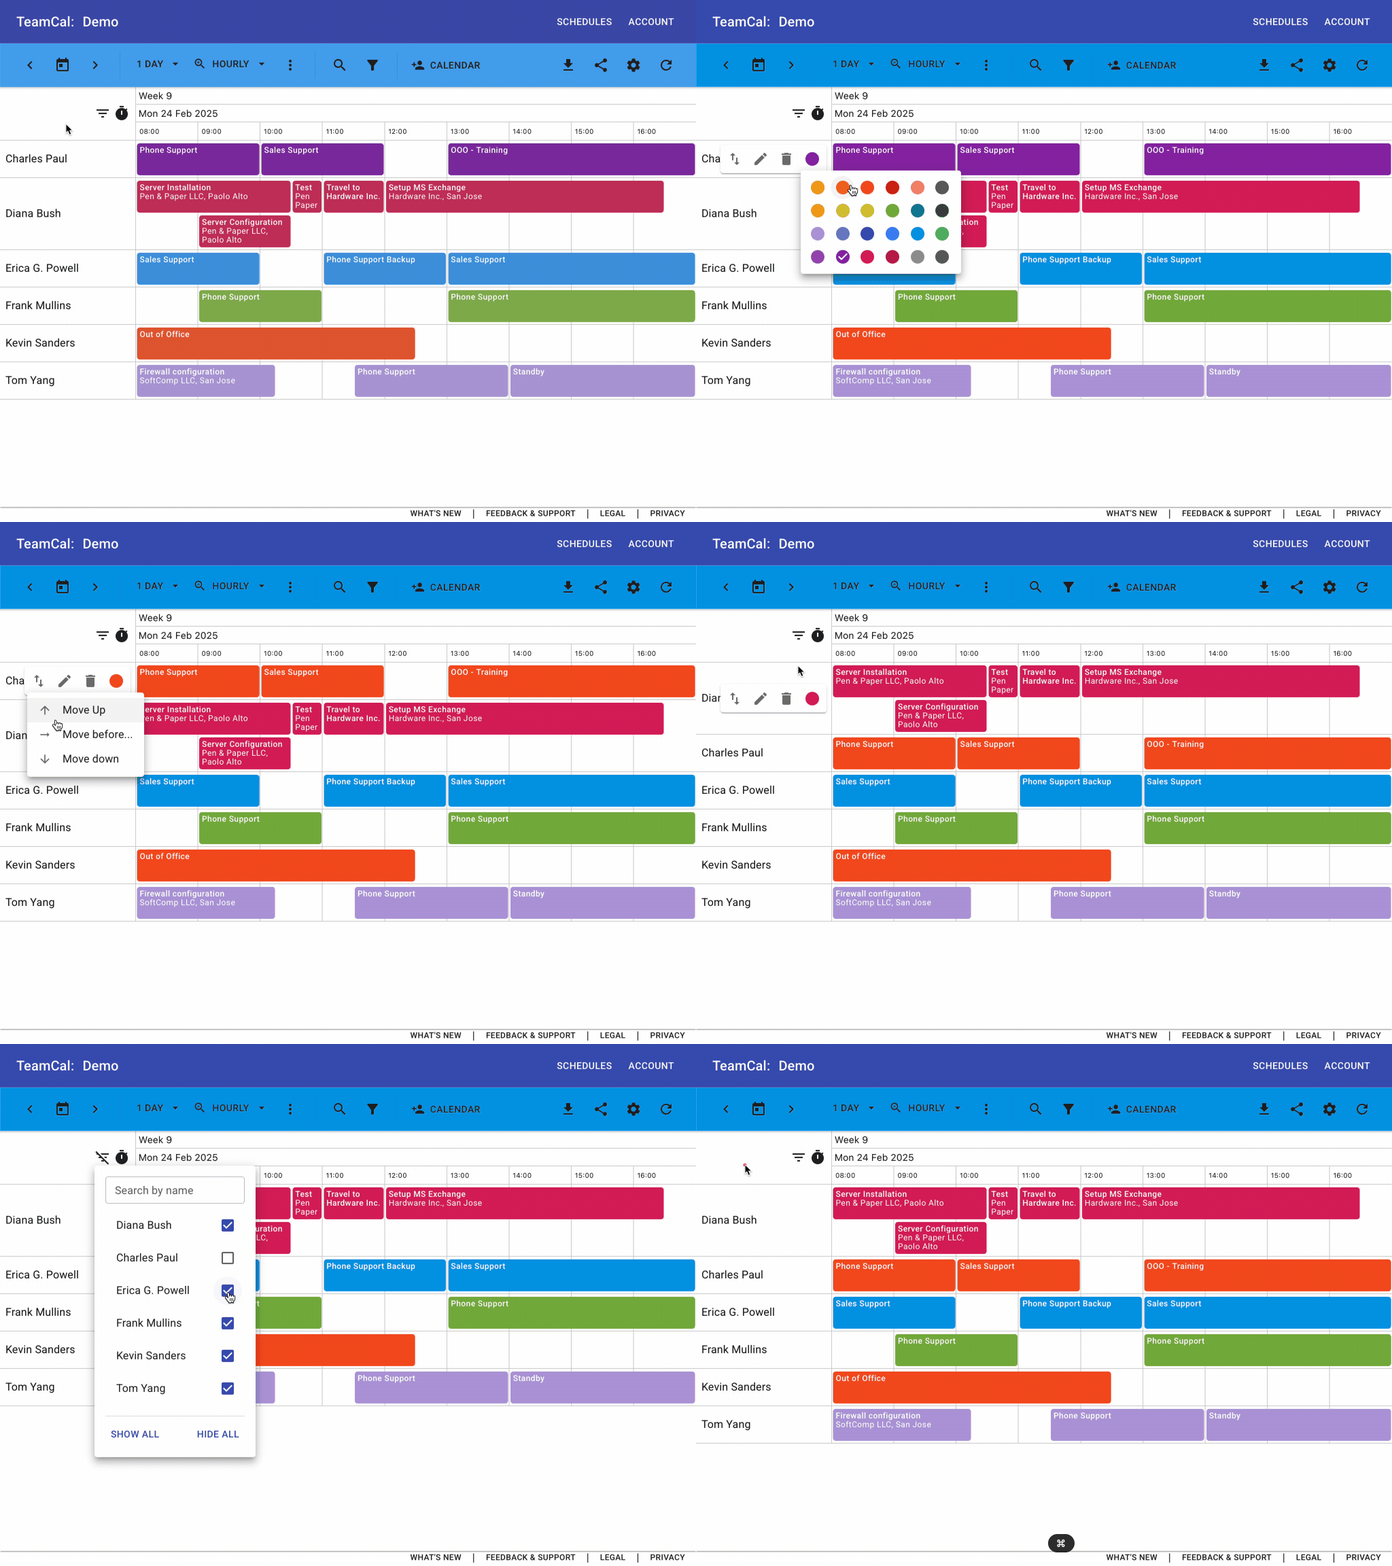
You can further customize the added calendars to change name, display order and default color. Open the context menu with the calendar actions by right clicking on the calendar you like to adjust. Choose “Delete” to remove a specific calendar from your schedule. The calendar will not be removed from Google Calendar, only from your schedule.
2. Adjust the scheduling view
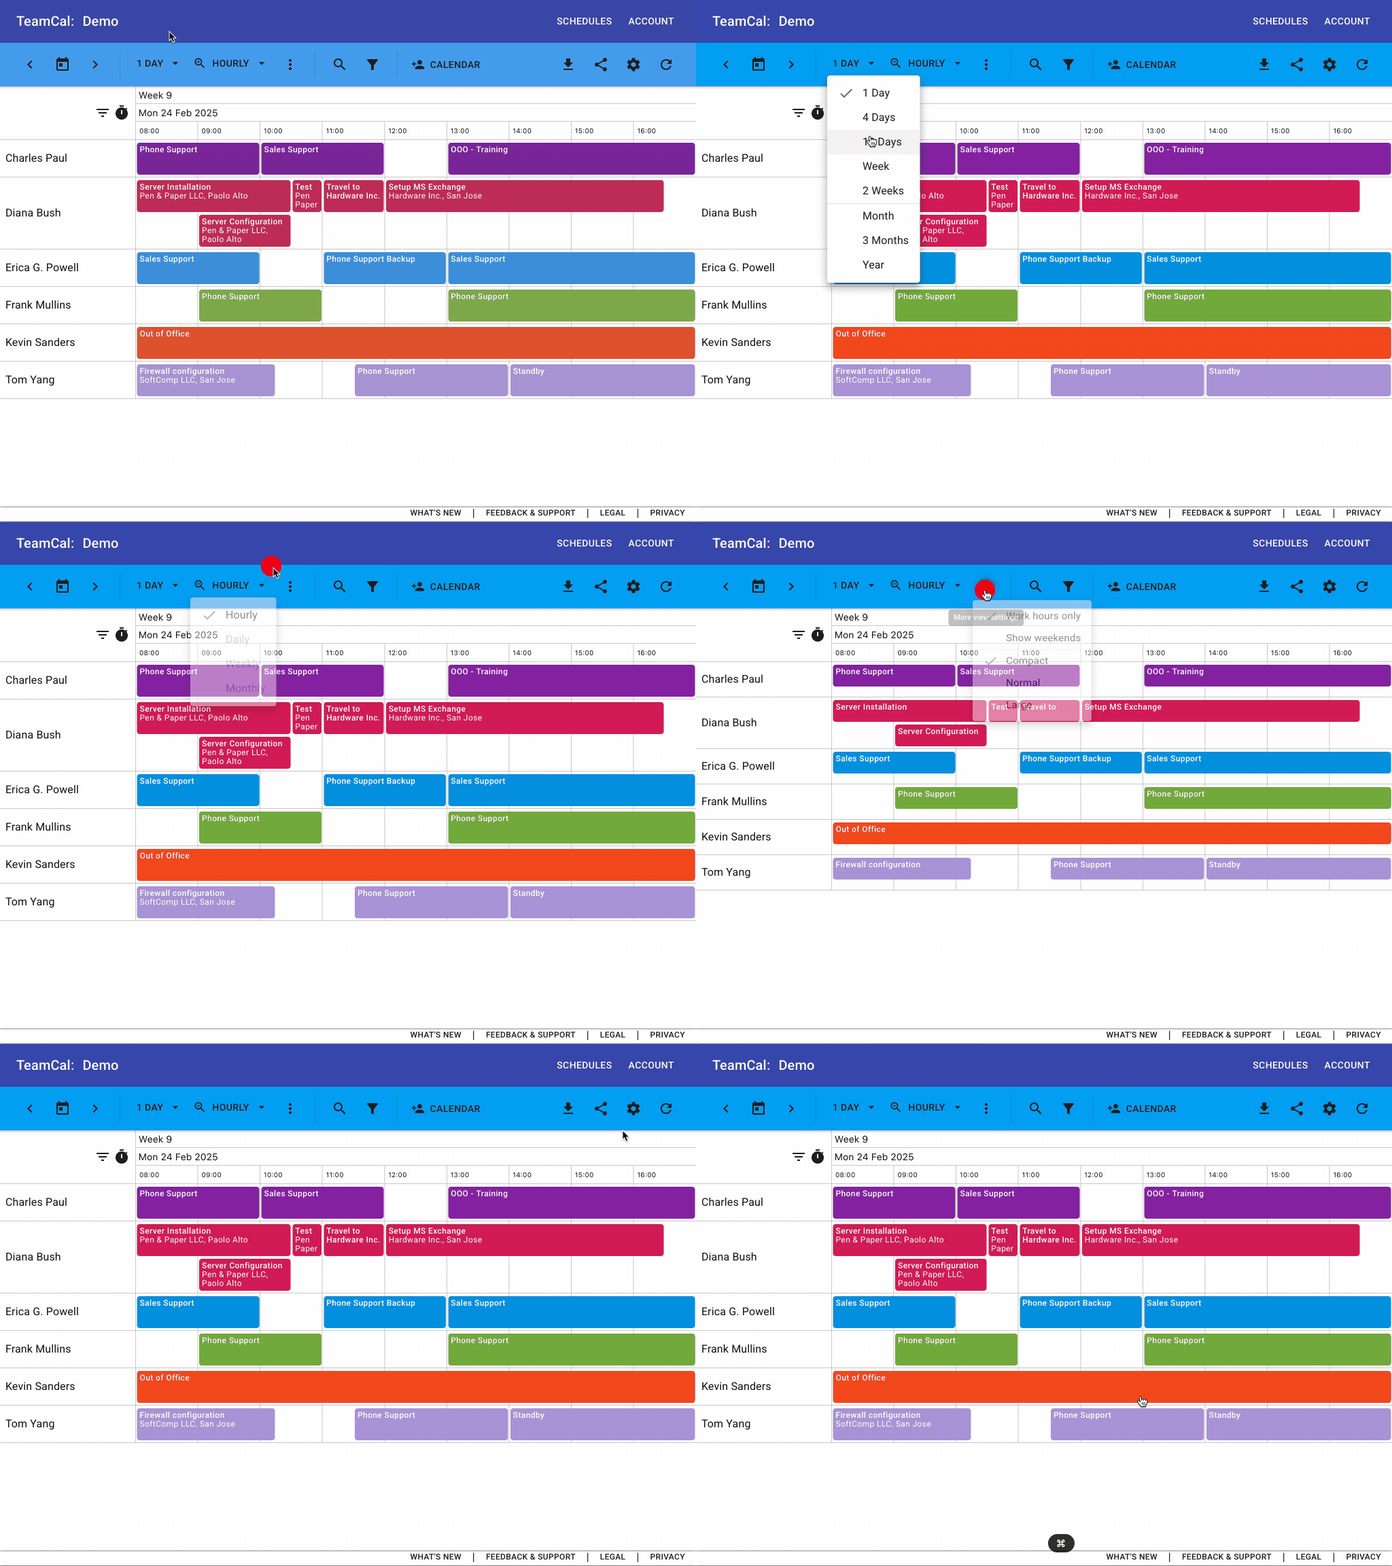
TeamCal offers multiple modes to see a more compact or detailed view of your schedule. You can adjust the scheduling view by changing the “View Timeframe” to switch between a day, multiple days, monthly, quarterly, or yearly display. If you are not happy with some of the default assumptions you can go to the schedule settings and change the timezone and work-hours to fit your needs.
3. Schedule events
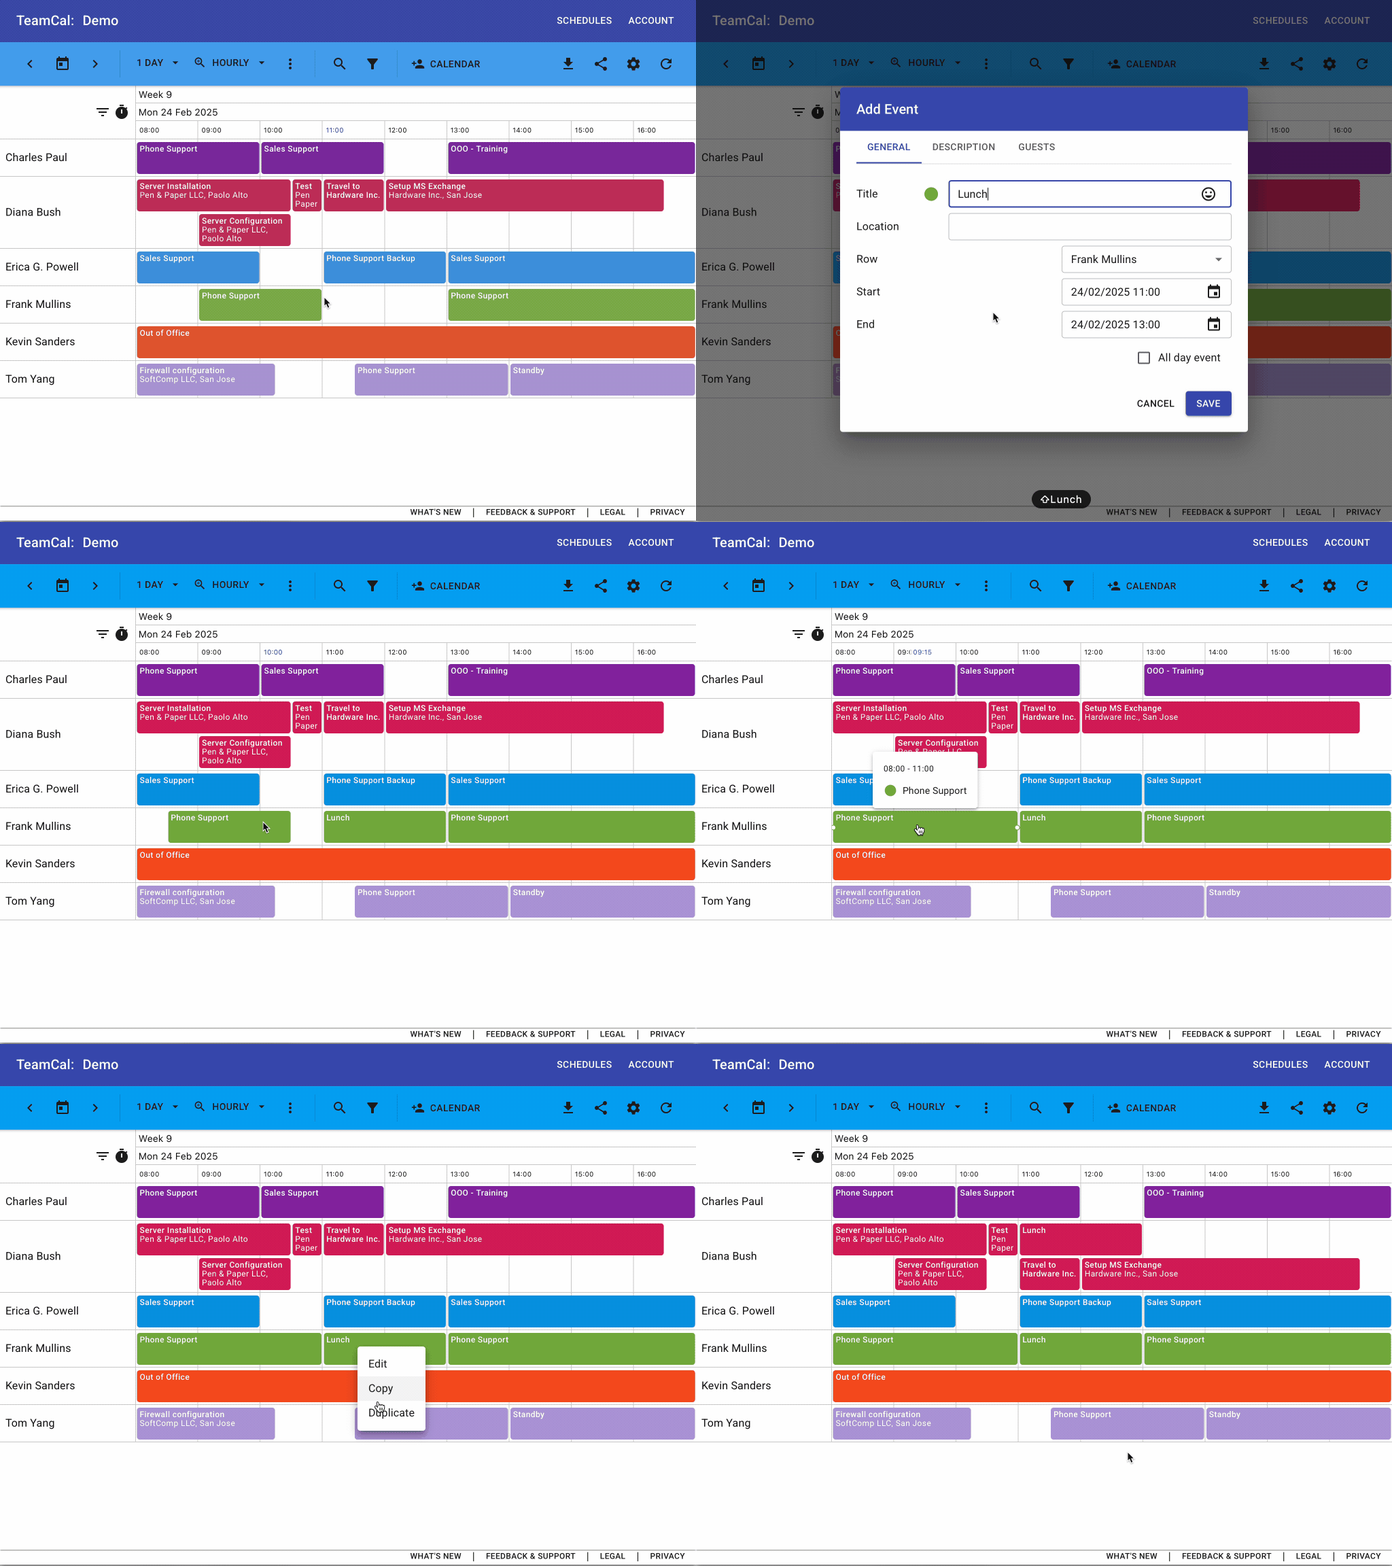
You can schedule events directly inside TeamCal. There is no need to go back to Google Calendar to manage the calendar events.
Use drag & drop to change the time of events and to move events between rows. You can also use drag & drop to create new events. Click on an event to change the event details like title, time, or description. Right click to copy or duplicate an event. When editing an event you can invite guests to the event and manage the event’s “guests” list.
5. Share the schedule
How about sharing a schedule with TeamCal’s sharing functionality? You can use a shared schedule to give your clients access or display it on a TV screen in your company. Tell me how!
6. Invite additional users
Invite your co-workers to your TeamCal account and let them have access to your schedule. Once invited they can see your all schedules and actively participate in scheduling. Read more.
7. Use the TeamCal Chrome extension
Access your TeamCal schedules directly from the Google Chrome toolbar. Open the right schedule in an instant from wherever you are. No need for web address typing or bookmarking to view your schedules. Install.
Once set up, don’t hesitate to let us know at info@teamcalapp.com if you need further assistance or have questions!